Showing posts with label crafting. Show all posts

Tuesday, November 28, 2017

Having fun with Vectoria Designs projects

I have already mentioned Vectoria Designs sometime.  I have used several of their designs to make pretty boxes and other stuff for Kassandra's house.  What I did not know is that it could be so much fun working with paper.

I have become a susbscriber of Tinne's channel in YouTube, and we are updated frequently with new ideas, tutorials, sneak peaks and even freebies!  What's better than that?

I have been busy lately putting in practice some of the ideas she offers for projects.  They are very easy to do, and so rewarding!  Best of all, some of them are even good as little gifts for friends and family.

Here are some of the things that I made:

From this tutorial

From this tutorial

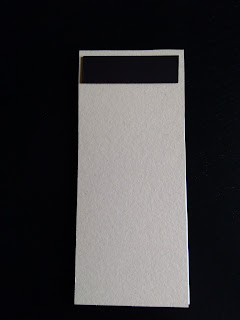
This is a project I thought of myself: the Chopin Liszt Shopping List (!):


As you can see, I even added a magnet to hang it on the fridge door

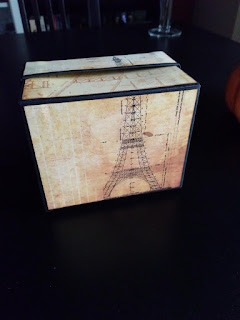
And this is what I am working on right now; a lovely industrial style box:


From this tutorial
 And after decorating it:


I still have a lot of work to do on this one; I have to make the metal corners, but give me time... 

I am sure you will find something on Tinne's channel that you may enjoy doing.  Go and have a look at her shop too!

Saturday, May 6, 2017

Textured rolls for crafting

I have been obssesed with Egyptian miniatures since I found out Lilliput's Treasure Egyptian collection.  

I wanted to craft an Egyptian tablet myself, just for the fun of it.  But I wanted it to have a 3D effect, instead of just doing a base with polymer clay and adding an picture on top.  Well, lo and behold, I found by chance a wonderful shop where they sell textured rolling pins with all kinds of engravings.  And to my surprise, they had an Egyptian roll too!

I could not believe my lucky stars, and I was quick in acquiring one.  I also got some Fimo in a soft beige color (the packet is called Sahara).  And today I got the time to use the roll for the first time, and the results are marvelous:


I am very excited about the possibilites.  I have not yet made the miniature tablet.  I am so happy how these two samples came out that I am turning them into magnets to gift to my classmates at the belly dancing academy.  I only need seven more, lol!  My mom says she wants one too.  I'll post pictures when they are finished.

Saturday, June 29, 2013

Crafting an edible treasure chest

My aunt's birthday was 2 days ago, but we are celebrating it tomorrow.  I have never baked a birthday cake, but when I saw a lovely tutorial to make a pirate or mermaid treasure chest I knew I had to make one for her:

Picture from the Etsy Blog entry
This is what I used:
Kit-Kat bars
Nesquik powder
A strip of black licorice
Brown sugar
Chocolate coins
A seashell candy mold
An artist brush
Wooden skewers

I followed the instructions provided in the tutorial.  I used the Wilton candy melts as "glue" to attach all the sides of the crate, and I extended it with the skewer - looked a lot simpler and cleaner to me.  Also, since I could not find jewels or edible pearls, I adorned the sand with a sea star and 2 seashells that I made with the seashell mold and the candy melts:

In the making process.  My Kit-Kat bars came in pieces of 2 instead of 4, so I had to attach 2 of them together to make each side of the crate.

Detail of the "handle"

Finished!
So, things that I learned while doing this:
- Work with chocolate in the Winter rather than in the Summer.  Seriously.
If you really have to make this during Summer:
- Work in an air-conditioned room if at all possible.
- If the air-conditioned room is not available, do it at first hour in the morning, while it is still fresh outside.
If you cannot do any of the above:
- Work with your hands as cold as possible.
- Stop the work every 5 minutes and put everything in the fridge for a while (except the melted chocolate) so it can cool and the chocolate of the bars does not melt.  Also, it will help the "glueing" process so the crate sides do not come apart.
I know this from my sad experience; my crate came apart (all parts of it!) when I had just finished it and was putting on the coins.  So I had to redo it all again.  That's why there is visible chocolate in the bars in the last pic.

I just hope my aunt likes it!

Thursday, May 27, 2010

More Absinthe crafting

But this time not in miniature. This time in real-life size, and for personal use, no less!

Have you ever crafted soap? It's so much fun, and I love to do it. The down side is that I can not craft soap all the time or my cupboards would be full of bars - although family and friends get their share sometimes, at Christmas or Valentine's Day. I confess that I don't know how to do the cold process method, and that I have enough with the melt and pour system. Yes, I know it's not the same, but it works for me. And I love making, displaying and using my own soaps!

Well, having fall in love with the Absinthe scent, I wanted to craft an Absinthe soap - that is, with anise scent. It was easy to find anise oil on eBay; I bought it from Bulk Oils, and it was an easy transaction with a fast shipping. But I was dying to get one of the Victorian Blossom molds:


Isn't it lovely? I found it some time ago in Southern Soapers; I could not resist more, and bought one. And with some clear soap, lime green dye, my new mold and the anise oil, I made this:


The two white thingies inside are a couple of real sugar cubes! Not only it looks beautiful, every time I enter the bathroom I can smell the anise scent in the air...

Friday, March 12, 2010

Lab Crafting

Yup, I do not only craft miniatures, but scientific crafting too!

My dear husband is so so busy these days that I pop in at the lab when everybody else is gone to keep him company. But I like to help if I can, and this is what I have been doing lately for him to use in his experiments. Bear with me, because this is long...

He taught me how to use this lathe so I could make holes in the bottom of little Petri dishes.

Dish before the process. The part on the left is the cover.

You secure the dish in the lathe:

And using the blade of the right (and much caution) you make a hole:


Dish after the cutting

When you have made holes in 20-25 dishes, you clean them up, scratching the rests of the plastic that have not come out. If you skip this step, cells get poisoned by the scraps and then they die :(

When you have finished cleaning them, you line them up in the table and take out 30mm round glass microscope covers. You can see them inside the big round dish:

These covers have been previously treated - you clean them 10 minutes under distilled running water, and leave them inside sulfuric acid overnight. The following day you clean them again under distilled running water and put them in a stove to dry overnight. You take the glue and put a circle on the bottom of the dish:


Then you take a glass cover and stick it to the glue:


You have to squeeze out the air bubbles:

And then you put them under an UV light for one hour on each side to cure the glue. Then there is no way the glue breaks or falls. Yup, the same UV that gives you a tan in a tanning saloon (and because I know how UV lights work, you will never see me in a tanning saloon).

Whew! What a work! Good thing is, doing this saves a lot of money for the lab. A ready made Petri dish with glass bottom costs around $10 - yes, research is expensive-. And this is a nice way to lower the costs.

Oh my, what a nerd I am :)

Wednesday, September 9, 2009

Hectic August

Wow, it's almost Fall and it's been some time since my last entry!

On my behalf I would say that it's been quite a hectic August; we went on vacation to Baltimore and Philadelphia, were I have begun a new collecting habit - penny coins. Sure you have seen those machines that you put a penny into and it squeezes it and engraves a design. No? Then, take a look at the Penny Collector web page.

I have been browsing a lot, looking for inspiration for new designs; also making little treasures for my mom's dollhouse; and of course, hunting for new objects for my own dollhouse.

I have purchased some little treasures since last time I shared pics, so here they are:

A whimsical working hourglass for the magic shop; a bit expensive, but worth the price, I think

A door bell for the shop

The lovely mortar and pestle for the study

An unusual book buggy; all these four come from Kerbey Lane Miniatures on eBay

I have been refining my chocolate boxes making technique; I bought a punch to make the top and the bottom more attractive than a simply square. And recently I have acquired some molds to make the bonbons and cookies.
I am waiting for some tin round boxes to arrive to begin crafting like crazy!

Thursday, April 2, 2009

Review - A book you need to have

Since my personal projects seem to be a bit slow these days, I'd like to share a fabulous find that will make the delights of every miniaturist, especially for the ones who love to craft.

I don't even remember how I found this book - I think it was a recommendation by Amazon, after I searched for miniatures. But it's one of those discoveries that simply have to be shared and praised to extenuation.

Sue Heaser is the author, and the book is called "Making Doll's House Miniatures with Polymer Clay".

The title says it all; you'll find a lot of projects to create everyday objects that, no matter what kind of dollhouse you have, will fit into your rooms: clocks, candle holders, plants, flowers, books, even a whole set of china (from plates to a tea set)!. You can find too recipes to make realistic food. It is filled with color pictures and easy to follow instructions, as well as tips to working with clay and lists of materials you can use. Even if you don't craft, you'll be amazed by how beautifully this book has been put together.

Obviously, there are different grades of difficulty in this book. And remember that practice makes perfection. Don't expect to craft a whole dinner in just one hour if you have never touched polymer clay before! Don't get discouraged. Begin with the simple projects and when you are happy with the results, begin to challenge yourself. Also, seek the opinion of someone else when you finish something. We are our worst critics, so it helps to have a friend or a family member to give you some feedback.

This book also gives you the tools to put your brain to work and come up with your own ideas and designs. If you only want to buy one book of miniature crafts, this one is the Oscar winner.

Although it may be difficult to believe, everything in this cover is made out of clay, except the table and the curtains.