It's been some time since my last entry, but I have been working on something special. My wedding anniversary was last month, and I wanted to make something really special for my husband. I already gave him a gift that he wanted very much, but I wanted to give him also something from the heart. He is a lover of Tolkien's work, so I thought, what better way to give him something that he can (somehow) use? A book nook!

I found a lovely shop that were selling empty book nooks, very affordable, and pretty, and that was my first stop - by the way, I strongly recommend them. The only bad thing was that the package took a long time to arrive, and it was not going to be ready for the anniversary - oh well, these things happen. So to increase the effect of surprise I waited until he was out of the house for a few days, giving some lessons in another part of the country - I had to work fast! On the bright side, the kit was amazingly cut, and there were instructions included to make things even easier. So the work started. First, I built the exterior part, and attached the included string of LED lights:

While the glue was setting, I printed the image that was going to be on the window; the kit included several landscapes, but we preferred that the image was coming from Tolkien's imagination as he was writing. So hubby chose a drawing of Gandalf fighting the Balrog, and I made it in transparency paper, like the ones the kit included.

Then I arranged the lights so they would illuminate well the image:


Gluing the interior walls to each other came next - but I did not glue them to the base. I thought it would be easier to put the decorative wallpaper without them being already attached:

 |
| You can see how the outside light is changing as the day goes by... So I stopped here for the day. |
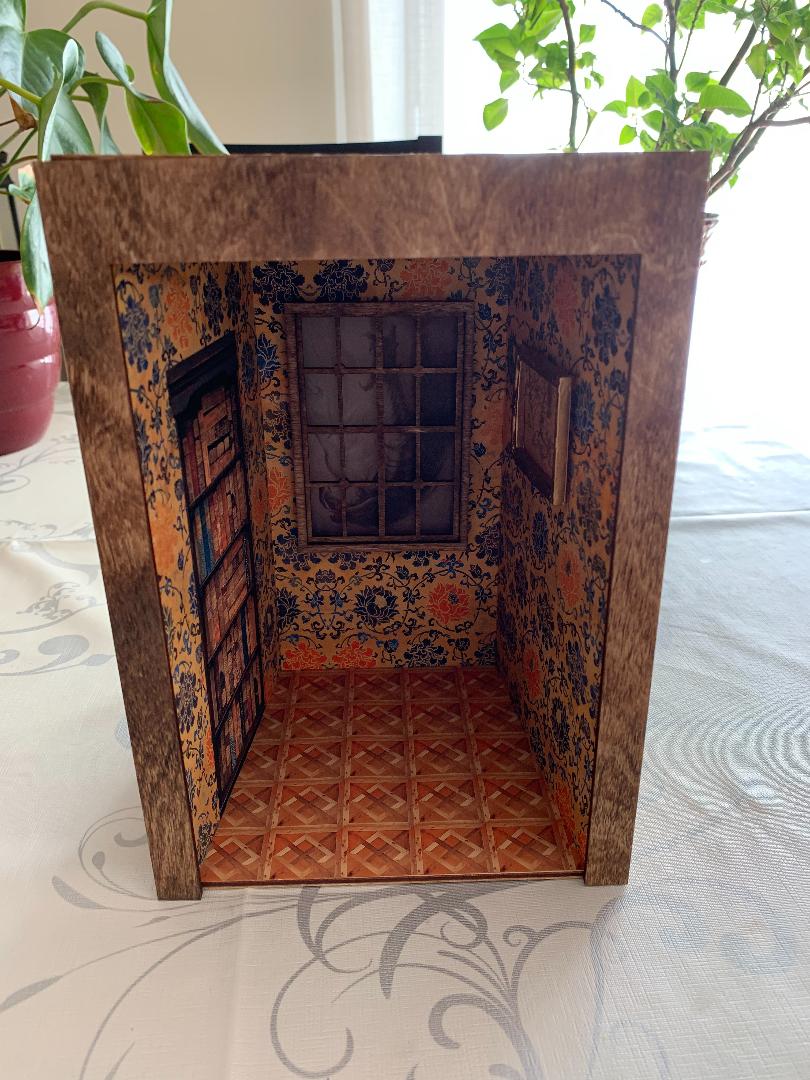
Next day work: decorating!! My favorite part. I printed a lovely wallpaper made by Evona, of Artsy Miniatures, and cut it to measure for the walls:

 |
| Cutting the hole for the window. No worries, as the window frame will cover any mistakes |

 |
| I absolutely love the integrated shelf! |
As you can see, there was a tiny bit at the top of the walls that was not covered, so I improvised a cornice, and finally glued down the inside walls:
 |
| Looking good! |
Next step, staining the window frame. That was the last thing of the day that I did, so it would be dry for next day's work session:
 |
| Not even enough light to take a pic, lol! |
Next day were the final tweakings. First, gluing on the window:

Then, arraging the final lights in the ceiling so the scene has a litte more light - I wanted to wallpaper the ceiling too, but I finally gave it up so the lights would be brighter:

Now it is almost done! Only lacking the floor, for which I chose a lovely French parquet:
 |
| Gorgeous design and colors! |
My job was finished. I still had to glue the front frame and decorate the outside. But I wanted hubby's opinion on that, and waited until he came back. I suggested we put a Tolkien book cover on the sides, but he preferred simply to stain the wood, so that's what I did:

For the decorations, I kept it simple: a writing desk with a vintage typewriter, some empty pages and some already typed, a pair of glasses, and a pipe resting on an ashtray - Tolkien smoked tobacco pipes. There is also a framed map of Middle Earth in the wall, and an umbrella hanging on the back of the chair - that damned English weather!


I am very happy how well it turned out! Hubby said he liked it a lot, and proceed to put it in a place of honor, very near his working table. He kept it lit all day!
