Thursday, March 14, 2024

The new modern bedroom is finished!

Finally!  Kassandra has finished her bedroom with the new modern decor.  And she thinks it looks fabulous.

We started by hanging the new mirror.  It looks phenomenal:


And we also placed a new minimalist nightstand.  Kassandra barely had space to put her stuff:

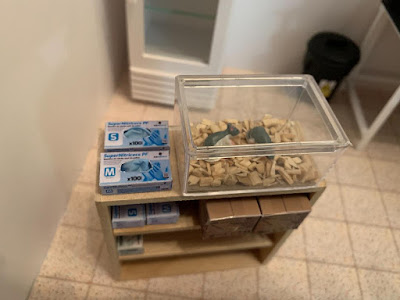
There is a "naugthy" box on the bottom and some condom boxes too...

And then, some details to live up the new dresser:

Love the nail polishes!

Next, the chandelier and the new lamp sconces; this time with a white, modern design instead of candles:


And finally, decorations.  Since the walls were bare, we needed some artwork to make them look cozy.  We started by some inspirational ballet posters:


Kassandra loved the simplicity and the style of the font.  She wanted to hang Paris pictures, but finally she decided to put up these instead.  The room looks lovely at night:


For the left wall, she chose a pas de deux picture:


And finally, the room is finished!


Kassandra is very happy with the changes, and so am I :)

Sunday, January 7, 2024

Free printable! TVA stationery from the Loki TV series

I am a big fan of Loki.

When I heard they were doing a series about him I though, "Yay! Time for him to shine not in the shadow of his brother!".  At the end, I was not a big fan of the plot of the series.  But I was definitely a fan of all the cool stationery and paper stuff of the Time Variance Authority shown in the series!

My husband was as well, so he asked me to make for him something that he could have on his table and use for his every day work.  And I was more than happy to comply!

So I created these cool TVA notepads sheets, that I am more than happy to share with you!

It's very easy to make a notepad out of these sheets.  I will provide instructions, or you can check out this great video on how to make them.

First, gather all your necessary materials:

- TVA sheets - I usually print 10; that way you get a 40 pages notepad.  You can do more or less, your choice.  Print them in regular copy paper.

- A piece of cardboard - I used 1mm cardboard; that's the same as cereal boxes or soda packets.

- White glue and a brush, or a palette for extending it.  If you have PVA glue or Mod Podge it works as well.

- A couple of clamps.

- A pencil, ruler and scissors, or X-Acto knife.

- Optional: double-sided tape.


1) Cut out all your TVA sheets.  Cut inside the lines if you don't want any black showing.

2) Use the ruler and pencil to trace a rectangle in the cardboard the same size as your TVA sheets.  Hint: it measures 12 x 9.3 cm.  Cut it and set it aside for now.

3) Gather the TVA sheets neatly, with all the borders aligned, and clamp them with the clamps.  I use a scrap piece of board so the clamps won't mark the paper.


4) Use the palette or the brush to extend a thin layer of glue on the top edge of the clamped sheets.  Let it dry completely and repeat the process a total of 3 times.


5) When everything is completly dry, you can attach the sheets to the piece of cardboard you cut previously.  You can glue them with the glue, or you can use double-sided tape.  Naturally, you can skip this last step, but I prefer to do it so the notepad will be more sturdy.  But again, it's up to you.

Well, there you go!  A very nice TVA notepad for your desk!  I included two different sheets for your project, one in orange and one in black.  I copied two designs that appear in the ending credits of the show:

Orange pad

Black pad

I hope you have lots of fun crafting these!  Feel free to print as many as you like, make gifts for friends and pass the file along to anyone; links back are nice too.  Just please do not sell the file or your creations.  Thank you very much, and enjoy! ♥

Wednesday, December 27, 2023

Free printable! Ballet calendar 2024

Happy holidays!

Long time no see!  It's been some time since my last entrance.  I have been busy with work stuff, preparing a belly dancing showcase, and also sick with COVID.  Both hubby and I caught it at the same time.  Thank goodness we were not that sick, and we were fully recovered in about 2 weeks.

So how about a little mini to celebrate the holiday season?  As each year, I am happy to provide a calendar for your mini scene.  And as always, with ballet scenes, because ballet goes with every decor.  Here is the link to the printie.

The picture that is featured in the calendar (which is special to me) is not included this year - I chose some new ballet pics I found on the internet.  However, if you like that particular pic, you can find it in last year's calendar printie.  For the pages I used the Print a Calendar website.


Feel free to print as many as you like, make gifts for friends and pass the file along to anyone; links back are nice too.  Just please do not sell the file or your creations.  Thank you very much, and enjoy! ♥

Monday, September 11, 2023

New Magictail skin! With extra fins!!!

Wow, I am so, so excited!!

Three weeks ago I went to take a look at the Magictail website, to see if they have something new that I could fancy.  Well, apart from the fabulous Marina Pro that will be mine someday, I was so surprised to find that they offer now tails with add-on fins!  

I was hooked.  The good thing about this feature is you can send them your previously owned Magictail and they will incorporate your chosen fins - this option is certainly cheaper.  But I was worried that my fabrics would not match, and that it would be a kerffufle to send my tail and get it back - it can always get lost in transit.  Besides, it was a good moment to get a new Marina skin, which was my first and most beloved tail.

And so, I ordered a Marina with hip and dorsal fins.  You can also add lower fins, but I chose to omit those.  Why?  Because the Magictail monofin is very bulky at the ankles, and I wanted to draw attention from it using the other two sets of fins.  You can get just one set of fins, or any combination of the three.

It took a little more than a week to ship, but I already knew that as it was specified at the time of purchase.  It arrived today in the mail, and I am over the Moon with it:

Front view; hip fins.  Monofin was inserted

Detail of the dorsal fin

Back view

The colors are absolutely out of this world.  It has changed a lot from my last Marina Magictail.  The fabric is not shimmery anymore, and the black/grey hues are totally gone.  Now we have vibrant blue and purple hues everywhere.  The scale design is also different - the scales are less rounded and more elongated:

Scales detail

Fluke detail.  Notice the difference in colors.  The fluke still has the extra fin tips that look gorgeous while swimming

The fins are not just a piece of fabric attached to the tail.  It actually has some kind of thick fabric insde - you can squeeze them, and they are mushy.  The fins have consistency and they keep their form.  However, they are not rigid; they are bendable and will not cause harm or inconvenience while sitting.  I cannot wait to see how the dorsal fin looks while swimming!


I have tried it on for the size - I got an L.  It fits me perfectly.  Another thing that they have modified is that the waist now has a pull cord to adjust the tail to your waist, so it won't slip down while swimming.  I have never had that problem, but I guess some people did when the tails got stretched after a lot of use, and they took that into consideration:


This time the tail did not come with matching bikini top and bottom - if you want those you have to get them separately now.

In any case, I am eager to try it out.  Hopefully I will be able to get some pics and maybe video next week.  I'll keep you posted!

Friday, July 14, 2023

My work featured in a book!

I had a surprise today when I found one of my old creations featured in a book!

The book in question is "How to be a vampire", by Amy Gray.  I was perusing the book and was so surprised when I found one of my wedding ring pillows (the ones I used to sell on my shop on Etsy) in page 79:

See the red pillow with ribbons and black leaves? That's mine!

I have absolutely no idea how this picture of my pillow got to be in this book.  I searched the book for pic references, and it only states that all pics (with some exceptions that do not include mine) come from Shutterstock.  So I guess that my picture got stolen at some point.  Which totally sucks.  But oh well...

Here I include the original picture I took of the wedding ring pillow when I put it up for sale, and the modifications that I made so it would look better on the listing:

Original, taken outside on a bright morning

Modified picture that I put as main on the listing

As you can see, they match exactly.  

Well, it is still as surprise that my work was interesting enough to be added to a vampire guide.  I feel honored!! ♥♥

Sunday, July 9, 2023

Scene: Beach wedding book nook

A new scene finished!  This time, it is a wedding beach scene for a couple of friends that got married last summer.  

I started the construction almost the same as the First Communion scene, but with slightly different measurements, because I wanted to add more decorations and needed extra room.

The easiest part was cutting some pieces of black foamboard for the walls, floor and celing:


Next, I tried a sand wallpaper for the floor.  The idea was that the wedding is taking place inside a tent, but since it is in the beach, there is no need for hard floors.  I liked the effect very much:

Very nice sand color!

Checking if I have enough space for the decorations...

Next, I mounted the structure of the "tent":


Then, I started wallpapering the sides and the back.  For the back I chose this beautiful picture from Evona´s shop:

Super pretty!

The rest, as you can see, is just white paper:


Then I started the work on the table that would hold the wedding cake.  I bought a chess table very cheap.  When I got it, I already knew I was going to paint it white.  I assumed that the chess board was a piece of paper glued to the table.  I was wrong!  It was actually painted it, and my white spray paint did not cover it:


Oh my, what to do?  No worries!  Since it is a beach wedding, I thought of adding a nice tile board on top.  I simply printed it on cardstock, glued it and applied a layer of Mod Podge to make it shiny, as tiles are:  

Love the Mediterranean vibe!

Vòila!  No trace of the chess board!  The tiles come from Pixelmarket's shop (she was nice enough to feature my table on her listing!).  Time to check the progress:

So nice!

Love it!

It took me a while to retake this project (two bellydance shows, the remodeling of Kassandra's bedroom), so now the pictures are scarce.  But anyway, the only thing to do was decorate the ceiling.  I found a very cute tutorial on YouTube to make hanging jellyfish, so I made two.  And I decorated the walls with some posters celebrating the newly wed couple.  Also, I added some battery operated LED string lights that my mother gave me, leftovers from a Christmas tree that she did not want anymore:


So, I finally attached the ceiling and covered the outside walls with a tropical leaves wallpaper:


Looking good!

I also purchased a kit to make wedding boxes and bags, from the shop of Odin's Miniatures, and finally, the scene is finished:


Lovely boxes and bags!

The happy couple's names are on the wall ♥

Love that cake!  And the bouquet! ♥

So, so happy with how it turned out!

Saturday, July 8, 2023

Review: Anastasia's necklace and earrings

Many of us have watched the animated movie Anastasia - or if you are lucky, maybe even the musical.  I have only seen the movie, and was hunted by the beautiful songs and the magic of a story that sadly, never came to past.  

As my interest for props used in movies is never ending, I wanted a replica of Anastasia's necklace - the one she used to open the musical box that her grandmother gave her.  As the movie is an animated one, the take on the necklace is an approximation.  However, I was lucky enough to find one that caught my attention.  The seller is LAcchiappasogni, from Etsy.  This is the exact necklace I bought.  I chose it mainly for the colors of the crystals and the size of the actual pendant.  I also chose a length of 65 cm and a type 3 chain.  Well, was I surprised when I received the package:

Look at that tiny Eiffel tower charm in the box!

 The packaging was done very carefully, and with great attention to detail.   I was enchanted by the Eiffel tower charm.  After all, it was "Together in Paris"!  I kept it and placed it on a shelf in my dollhouse.

And look at that!  The seller included a little gift in the tiny envelope.  A pair of clover earrings  So cute!! 

Now, back at the necklace.  It is simple gorgeous!  It is made with Swarovsky crystals, and you can tell by the way they shine and reflect the light.  The chain is very dainty and delicate, and also reflects the light beautifully - just like the one in the movie.  And of course, there is the engraving "Together in Paris" in the back of the pendant:


I am very happy with it.  I think it is a very well researched piece of jewelry.  It is obvious that there is a lot of care in the making of this necklace, to make it as screen accurate as possible.  That said, I would not give this necklace to a child smaller than 15-16 years old.  Playing with it would probably ruin it, as it is meant to be just worn and not handled too much.  

I also got a pair of earrings that Anastasia takes to the ballet:


I chose them with the silver setting.  They require pierced ears, as they close with a stud.  They are perfect.  They are not heavy at all, and are simple enough to be worn frequently or with any outfit.  They really look like a pair of icicles, and they shine beautifully!  They do not really scream movie accessory, and that makes them even better.  Good for ice princesses too! 

I highly recommend both of them!